


Battery Capacity Planning for Off-Grid Adventure Trips
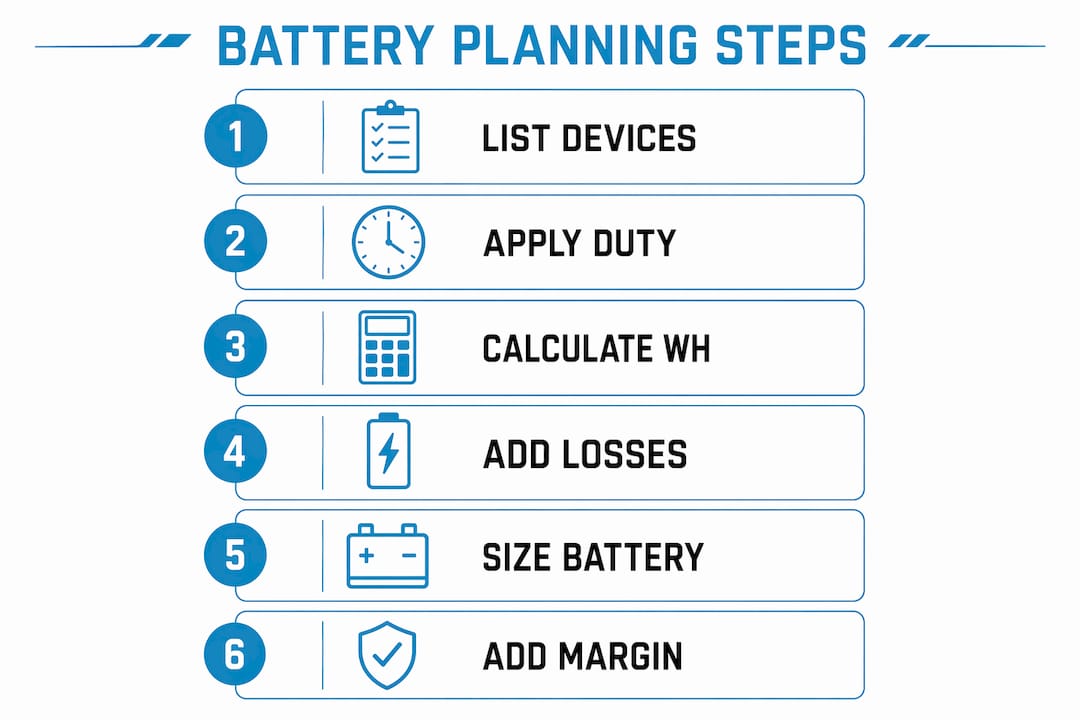
Do a power audit, convert watt-hours to amp-hours at your system voltage, then add a 20–30% margin. That’s the whole rule. For most multi-day trips, the formula is: daily Wh × autonomy days ÷ 0.80 (LiFePO4 usable depth of discharge). A 1,400 Wh/day trip with 2 days of autonomy works out to 2,800 Wh ÷ 0.80 = 3,500 Wh nameplate capacity; at 12V this is about 292 Ah, so you’d round up to 300 Ah. Daily consumption bands run roughly 400–800 Wh/day for a weekend warrior and 800–1,500 Wh/day for a road tripper.
- Step 1: List every device you’ll run
- Step 2: Multiply watts × hours per day = device Wh
- Step 3: Sum all device Wh for a daily total
- Step 4: Multiply by autonomy days, divide by DoD (0.80 for LiFePO4, 0.50 for AGM)
- Step 5: Add 20–30% margin for aging and efficiency loss
Quick calc: 1,400 Wh/day × 2 days = 2,800 Wh → ÷0.80 = 3,500 Wh nameplate → ÷12V = 292 Ah → round to 300 Ah
Table of Contents
- How do you run a power audit for battery capacity planning on adventure trips?
- How do you size a battery bank and apply the right margin?
- What charging options work best for restoring energy on adventure trips?
- LiFePO4 vs AGM: which chemistry and inverter size suit adventure use?
- How do heat, dust, and partial charging accelerate battery degradation on trips?
- Sample pack builds for common adventure trip types
- Safety checklist and US transport notes for lithium batteries
- What vendor-grade guidance does Bansheebatteries offer for adventure builds?
- Bansheebatteries powers your off-grid build from audit to trail
- Key Takeaways
- Conservative planning wins every time in the field
- Useful sources and further reading
How do you run a power audit for battery capacity planning on adventure trips?
The single biggest mistake in adventure trip battery management is guessing, or worse, copying a popular kit. Experts consistently flag this as the root cause of most power failures in the field.
Follow this sequence:
- List every device you plan to run (fridge, lights, phone chargers, GPS, laptop, water pump)
- Enter each device’s watt rating from the label or spec sheet
- Estimate realistic hours of use per day
- Apply a duty cycle for cycling devices (compressor fridges, heaters)
- Calculate device Wh = watts × hours × duty cycle
- Sum all device Wh for your daily total, then convert to Ah
Sample device audit table:
| Device | Watts | Hours/Day | Duty Cycle | Daily Wh |
|---|---|---|---|---|
| Compressor fridge | 45 | 24 | 35% | — |
| LED lighting | 20 | 5 | 100% | 100 |
| Phone/tablet charging | 30 | 3 | 100% | 90 |
| Laptop | 65 | 4 | 100% | — |
| Water pump | 60 | — | 100% | 30 |
| GPS/radio | 15 | 8 | 100% | — |
| Total | 978 Wh |
Compressor fridges are the most commonly miscalculated load. Their duty cycle runs around 30–35%, so using continuous wattage for 24 hours grossly overstates the draw. Check the spec sheet first; some manufacturers publish average daily Wh directly, which you can enter straight into your audit.
For AC loads running through an inverter, add 10–15% for inverter losses. Solar and charge controller losses add another 5–10%. A practical correction: multiply your raw daily Wh total by 1.15 before sizing to account for these system inefficiencies.
Formula: Ah = (Total Wh × 1.15) ÷ system voltage ÷ DoD
For a 978 Wh/day audit on a 12V system with LiFePO4: (978 × 1.15) ÷ 12 ÷ 0.80 = 117 Ah per day of autonomy.
How do you size a battery bank and apply the right margin?
Usable capacity is not the same as nameplate capacity, and confusing the two is the most common miscalculation in power planning for outdoor trips. AGM batteries should be treated at 50% DoD; LiFePO4 gives you 80–90% usable DoD.
Worked example for 1,400 Wh/day × 2-day autonomy:
- LiFePO4 path: 1,400 × 2 = 2,800 Wh ÷ 0.80 DoD = 3,500 Wh nameplate → at 12V: 292 Ah → round to 300 Ah. Weight: roughly 70–80 lbs for two 150Ah modules.
- AGM path: 2,800 Wh ÷ 0.50 DoD = 5,600 Wh nameplate → at 12V: 467 Ah. Weight: 150+ lbs. Same energy, nearly double the mass.
Then add the margin. Experts recommend 20–30% on top of calculated needs because batteries lose capacity as they age, temperatures reduce efficiency, and partial charging cycles compound losses over time. For the LiFePO4 example: 292 Ah × 1.25 = 365 Ah. Two 200Ah modules get you there.
- LiFePO4 offers 2,000–5,000 cycles at 80% DoD vs. 300–500 for AGM
- AGM costs less upfront but weighs roughly 2.5× more per kWh
- LiFePO4 handles partial charging without the sulfation damage that shortens AGM life
- AGM is a reasonable choice for short weekend trips where weight is less critical
Pro Tip: If space or payload limits your bank size today, wire your system with oversized cable runs and a bus bar rated for future expansion. Adding a second battery later costs far less than rebuilding the wiring.
What charging options work best for restoring energy on adventure trips?
No battery bank survives a multi-day trip without a recharge plan. The right mix depends on your daily deficit, how much you drive, and where you camp.
Solar is the default for stationary camping. The sizing rule: solar watts peak = daily Wh ÷ (peak sun hours × system efficiency). At typical peak sun hours, panel wattage is sized accordingly, with example calculations showing approximate panel wattage needed. Drop to 4 peak sun hours in overcast or northern conditions and you need closer to 467W. Always size for your worst expected sun, not your best. A solar camp setup pairs best with an MPPT charge controller, which harvests 5–30% more energy than a PWM controller from the same panels.
Alternator/DC-DC charging fills the gap while you drive. A quality DC-DC charger (also called a battery-to-battery charger) delivers a controlled charge profile that LiFePO4 chemistry requires. Standard alternators can push 50–100A into a bank depending on the vehicle, but a DC-DC charger limits the draw to protect the alternator and ensures the correct charge voltage. Two hours of highway driving can recover 50–100Ah depending on charger rating.
Portable generators make sense for large single loads (air conditioning, power tools) or extended cloudy stretches where solar falls short. The fuel and weight trade-off is real: a 2,000W inverter generator weighs 40–50 lbs and burns roughly 0.1–0.2 gallons per hour at partial load. For most adventure travelers, a generator supplements rather than replaces solar.
EV charging strategy applies when your tow vehicle or support vehicle is electric. Plan charging stops to 80% SoC for time efficiency and avoid letting the pack drop below 10–20%. DC fast charging tapers sharply above 80%, so the last 20% takes as long as the first 70%.
Charging taper reality: Charging from low to around 80% at a DC fast charger takes significantly less time than charging the last portion to full; stopping at about 80% optimizes trip time.
Pro Tip: For gas vs. electric vehicle trade-offs on adventure trips, recreational vehicle comparisons can help you decide which platform suits your charging strategy before you commit to a build.
LiFePO4 vs AGM: which chemistry and inverter size suit adventure use?
LiFePO4 is the default choice for extended builds. Higher upfront cost, but far more cycles, lighter weight, and greater usable capacity make it the practical winner for anyone planning more than a weekend trip.
- LiFePO4: 2,000–5,000+ cycles, 80–90% usable DoD, ~12 kg per kWh, requires a lithium-compatible charger
- AGM: 300–500 cycles, 50% usable DoD, ~30 kg per kWh, works with standard chargers, lower purchase price
For inverter sizing, add up all simultaneous AC loads. A compressor fridge (45W running, 150W surge) plus a laptop (65W) plus lighting (20W) = 130W continuous, 265W surge. Size the inverter’s continuous rating above your continuous load and confirm the surge rating handles your largest starting load. A 1,000W pure sine inverter covers most adventure setups; go to 2,000W if you’re running power tools or a small appliance.
BMS compatibility matters: Never connect a lithium battery to a charger with an equalization phase. Equalization voltages designed for flooded lead-acid will damage LiFePO4 cells. Use only a charger explicitly rated for lithium or LiFePO4 chemistry.
One cold-weather caveat: most LiFePO4 batteries cannot accept a charge below 32°F (0°C). The BMS will cut off charging to protect the cells. In cold climates, insulate the battery compartment or use a self-heating LiFePO4 variant. Discharging at low temperatures is generally fine; charging is the constraint.
How do heat, dust, and partial charging accelerate battery degradation on trips?
Heat is the fastest killer of battery life. A pack rated for a decade in a climate-controlled lab can see its effective life cut in half under repeated exposure to hot vehicle interiors and direct sun. Dusty environments compound the problem by clogging vents and trapping heat around cells.
Pre-trip and in-field maintenance checklist:
| Task | When | Why |
|---|---|---|
| Inspect terminals and connectors | Before departure | Corrosion raises resistance and generates heat |
| Confirm resting voltage matches expected SoC | Before departure | Catches a weak cell before the trip starts |
| Keep battery out of direct sun | Daily | Ambient heat above 95°F accelerates degradation |
| Charge to 80%, not 100%, for daily use | Daily | Reduces stress on cells during cycling |
| Store at 40–60% SoC for long-term storage | End of trip | Prevents deep self-discharge and overcharge damage |
| Check firmware updates (smart BMS units) | Monthly | Improves charge algorithms and protection thresholds |
Partial solar charging, where a battery cycles between 30% and 70% repeatedly without ever reaching full charge, is actually fine for LiFePO4. It’s the frequent deep discharges below 20% and the habit of leaving the pack at 100% for weeks that shorten life. For LiFePO4 storage best practices, the 40–60% storage charge rule applies any time the battery sits unused for more than a few weeks.
Portable power stations face an additional risk: the inverter, fans, and capacitors inside often fail before the cells do in hot, dusty field conditions. Ventilation and shade matter as much for an all-in-one unit as for a bare cell bank.
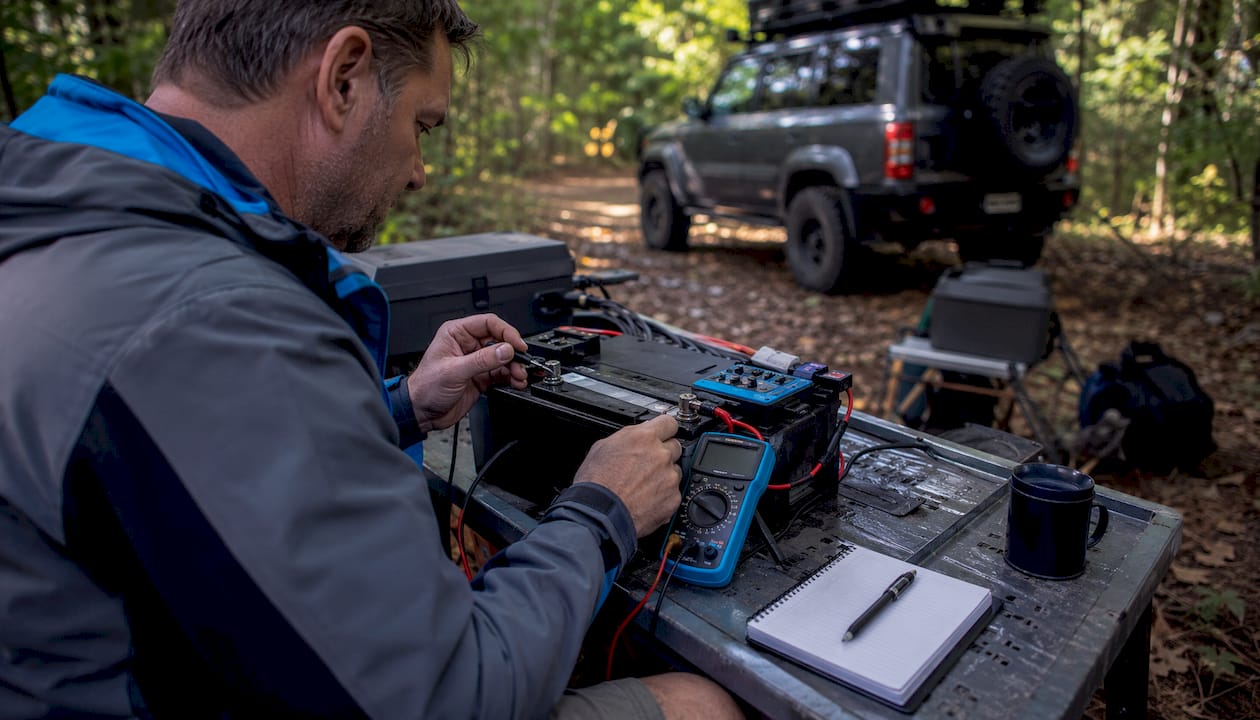
Pro Tip: Before any multi-day trip, run a full discharge/charge cycle at home and log the actual Ah returned. If the measured capacity is more than 10–15% below nameplate, the pack needs replacement before you rely on it in the field.
Sample pack builds for common adventure trip types
These builds apply the audit math and 20–30% margin from earlier sections. Costs are ballpark ranges and vary by brand and retailer.
| Build | Daily Wh | Battery | Solar | Inverter | Est. Weight | Est. Cost |
|---|---|---|---|---|---|---|
| Weekend minimalist | 400–800 Wh | 100Ah LiFePO4 (12V) | 200W | 500W | — | — |
| Road tripper | 800–1,500 Wh | 200Ah LiFePO4 (12V) | 400W | 1,000W | — | — |
| Extended overland | — | 400Ah LiFePO4 (12V) | 600W | 2,000W | — | — |
| Vehicle-based base camp | — | 600Ah LiFePO4 (24V) | 800W+ | — | 160 lbs | — |
Each build assumes 2-day autonomy and includes the 20–30% margin in the battery sizing. The weekend minimalist build maps directly to a single 12V 100Ah LiFePO4 module; the road tripper uses two in parallel. Wire every system with a bus bar and cable runs rated for the next tier up so expansion requires adding a battery, not rebuilding the wiring.
Safety checklist and US transport notes for lithium batteries
- Secure mounting: Use a battery box or dedicated tray with hold-down straps. A loose 70-lb LiFePO4 module becomes a projectile in a rollover.
- Fuse at the source: Install an ANL fuse within 18 inches of the positive battery terminal, sized 25% above your maximum continuous load.
- Correct wire gauge: Undersized wire generates heat. For a 200Ah 12V system, use 2/0 AWG for main runs; consult an ampacity chart for branch circuits.
- Ventilation: LiFePO4 produces minimal gas under normal operation, but a dedicated vented compartment is still good practice, especially for AGM.
- Placement: Keep batteries away from exhaust pipes, engine heat, and direct sun exposure inside the vehicle.
- Transport and shipping: The FAA restricts large lithium batteries (above 100Wh) in checked baggage and prohibits most above 160Wh. For ground shipping, carriers follow DOT 49 CFR Part 173 rules. Check the current carrier guidelines before shipping any lithium pack over 100Wh; regulations change and vary by carrier.
- Field emergency: If a battery overheats, swells, or emits smoke, disconnect it immediately if safe to do so, move away from the vehicle, and call 911. Use a large volume of water on a lithium fire; standard dry chemical extinguishers are ineffective on lithium-ion thermal runaway.
- Carry spares: A spare ANL fuse, a roll of self-amalgamating tape, terminal covers, and a multimeter weigh under a pound and have saved more than a few trips.
For powersports vehicle wiring and conversion safety, the same fusing and wire-gauge principles apply at smaller scale.
What vendor-grade guidance does Bansheebatteries offer for adventure builds?
Bansheebatteries has been designing and manufacturing AGM and LiFePO4 batteries for powersports and marine applications for over 20 years. Their warranty terms reflect that depth: 4 years on AGM batteries and 5 years on lithium marine batteries, which is among the longer coverage windows in the category.
Before any battery ships or gets installed, a reputable vendor should perform:
- Voltage under load test to confirm the cell can sustain rated output
- Capacity spot test (discharge to rated DoD and measure actual Ah returned)
- Visual inspection for swelling, terminal damage, or BMS fault codes
- Confirmation that the BMS firmware is current
When you contact technical support, ask for the cycle-life data at your expected DoD, the operating temperature range (especially the low-temperature charge cutoff), and the recommended charging profile (absorption voltage, float voltage, charge current limits). These three numbers determine whether your charger and battery are actually compatible.
The question most buyers skip: “What charge voltage does the BMS expect at absorption, and does my DC-DC charger match that profile?” A mismatch here quietly shortens cycle life without triggering any obvious fault.
Bansheebatteries’s blog covers AGM maintenance under field conditions and UTV battery selection criteria in detail, both useful references for readers building vehicle-based systems. For powersports-specific maintenance beyond the battery, powersports vehicle care guides cover the broader mechanical context.
Bansheebatteries powers your off-grid build from audit to trail
Running the audit math is the hard part. Sourcing the hardware shouldn’t be. Bansheebatteries offers LiFePO4 marine and deep-cycle batteries that map directly to the sample builds above, from a single 100Ah module for a weekend minimalist setup to multi-battery configurations for extended overland rigs. Every lithium battery carries a 5-year warranty, and AGM options come with a 4-year warranty, so you’re covered if a cell fails mid-season rather than mid-trip.
Before you order, confirm your charger’s absorption voltage matches the battery’s BMS profile. Bansheebatteries’s support team can walk you through charger compatibility and recommended charge profiles for your specific build. Run your audit, pick the sample build that fits your daily Wh, and browse the full LiFePO4 lineup to match modules to your system voltage and autonomy target.
Key Takeaways
Accurate battery capacity planning for adventure trips comes down to one discipline: audit your actual loads, apply usable DoD by chemistry, and add a 20–30% margin before you buy anything.
| Point | Details |
|---|---|
| Power audit first | List every device, apply duty cycles, sum daily Wh before sizing any component. |
| DoD by chemistry | LiFePO4 gives 80% usable DoD; AGM gives 50% — nameplate capacity is not usable capacity. |
| Add 20–30% margin | Battery aging, temperature losses, and efficiency drops make this margin non-negotiable. |
| Match your charging mix | Solar, alternator/DC-DC, and generator each fill a different role; size solar to worst-case sun hours. |
| Bansheebatteries | Offers AGM (4-year warranty) and LiFePO4 (5-year warranty) batteries that map to every sample build tier above. |
Conservative planning wins every time in the field
The conventional wisdom says “buy what you think you need and upgrade later.” On an adventure trip, that logic fails at the worst possible moment, 80 miles from the nearest town with a dead fridge and a flat phone.
Conservative sizing, meaning the 20–30% margin plus a redundant charging source, costs maybe $200–$400 more upfront. An emergency generator rental, a tow, or a ruined food supply costs more than that and burns a day of your trip. The math isn’t close.
There’s a nuance worth naming: at some point, adding more battery capacity has diminishing returns compared to adding a small generator or an extra 100W of solar. If your daily deficit is 400Wh and you’re already carrying 600Ah of LiFePO4, another 200Ah won’t save you. A 1,000W generator that weighs 40 lbs will. Know which constraint you’re actually solving for before you spend.
The systematic audit, not kit-copying, is what separates travelers who come home with stories from those who come home early.
Useful sources and further reading
- VoltPlan: How to Plan Your Camper Electrical System — best starting point for the full 6-step planning sequence, daily consumption bands, and solar sizing formulas
- Overlanding.tools Battery Bank Calculator — use for duty-cycle references and DoD-based sizing math
- ChargeCalcs: EV Road Trip Planning Guide — apply the 10–20% SoC floor and 80% charge cap guidance for EV-assisted trips
- DavidZer: How to Maintain a Solar Generator Battery — detailed maintenance habits and charge-window recommendations (20–80% cycling, 40–60% storage)
- PortablePowerLab: How Long Do Portable Power Stations Last? — component failure risks in hot/dusty field use
- Energy New England: Planning an EV Road Trip — practical EV charging level guide and route planning app comparisons for US travel
- EXPLORIST.life: How Many Batteries Do You Need? — browser-based power audit calculator with duty-cycle sliders