


Overland Dual Battery Setup: Choosing and Wiring It Right
For most overlanders, a LiFePO4 auxiliary battery charged through a DC-DC charger is the right call. It gives you more usable power for less weight and won’t confuse a modern smart alternator the way an old-school isolator can. The rest of this guide covers sizing, wiring, and testing, with Banshee Batteries’ LiFePO4 lineup and multi-year warranties as a solid starting point for parts.
TL;DR:
- Most overlanders should use a LiFePO4 auxiliary battery with a DC-DC charger for better efficiency, weight savings, and compatibility with modern smart alternators.
- Proper system sizing requires calculating daily amp-hour needs based on all devices, then choosing a battery with appropriate usable capacity plus a 15-20% buffer.
- A DC-DC charger sized to your alternator, matched to your battery chemistry, is the safest and most reliable charging method for modern vehicles.
- Correct wiring, fusing, and secure installation are essential to prevent voltage drops, shorts, and battery damage, especially for runs over two meters.
- Regularly test each battery separately after disconnecting the system, and focus on proper maintenance to avoid hidden failures that could leave you stranded.
Table of Contents
- What Does an Overland Dual Battery System Actually Do?
- AGM vs LiFePO4: Which Battery Chemistry Fits Your Rig?
- Isolator, DC-DC Charger, or BMS: Which Charging Setup Do You Need?
- How Do You Size Your Auxiliary Battery for Your Trip?
- Wiring and Installation: What Does the Checklist Look Like?
- How Do You Test and Maintain a Dual Battery System?
- Comparison of Popular Dual Battery System Brands and Their Features
- What Should You Budget for a Dual Battery Setup?
- Why Isn’t My Dual Battery System Working Right?
- How Do You Add Solar Panels and Inverters to Your Setup?
- What I’ve Learned Watching Overlanders Build These Systems
- Get the Right Battery for Your Overland Build
- Sources
What Does an Overland Dual Battery System Actually Do?
A dual battery setup splits your electrical system into two jobs. Your starter battery cranks the engine and nothing else touches it. Your auxiliary battery runs everything else, isolated so a dead fridge battery never leaves you stranded at a trailhead.
That separation is the whole point of an overland dual battery system — isolators, combiners, or DC-DC chargers keep the starter protected no matter how hard you run the house side.
Typical loads pulling from the aux battery include:
- A 12V fridge or freezer, often the biggest single draw on a trip
- LED light bars, awning lights, and interior lighting
- Water pumps and shower systems
- Radios, chargers, and communication gear
- Inverters running laptops or small appliances
Charging comes from two places on the road: the alternator through a charger, and solar panels when you’re parked. Both need to reach the aux battery without backfeeding the starter.
AGM vs LiFePO4: Which Battery Chemistry Fits Your Rig?
LiFePO4 wins on nearly every metric that matters for overland use, but AGM still has a place. The decision comes down to where you’re mounting the battery, how much weight you can spare, and what you’re willing to spend upfront.
LiFePO4 gives you roughly 80% usable capacity compared to AGM’s 50 to 60%, which means a 100Ah lithium battery often out-performs a 150Ah AGM in real-world runtime. It also weighs less than half as much and typically lasts three to four times longer in cycle count.
Statistic Callout: Plan around 50 to 60% usable capacity for AGM and about 80% for LiFePO4 when sizing a system, factoring in extra buffer for heat and battery age.
Here’s how they stack up on the factors that actually change your buying decision:
- Usable capacity: AGM roughly half its rating; LiFePO4 closer to four-fifths
- Weight: LiFePO4 often 50 to 60% lighter for the same rated Ah
- Cost: AGM cheaper upfront; LiFePO4 costs more per Ah but lasts longer
- Charge acceptance: LiFePO4 accepts higher charge rates, cutting recharge time
- Cold tolerance: AGM handles cold starts better; LiFePO4 needs low-temp protection
AGM still makes sense under the hood or in tight, budget-conscious builds. LiFePO4 earns its premium on multi-day trips where every pound and every extra runtime hour counts. Never mix chemistries in the same bank unless your charger and BMS explicitly support both profiles. Banshee Batteries builds its LiFePO4 packs specifically for this dual-battery role, backed by a 5-year warranty on lithium marine batteries and a 4-year warranty on AGM.
Isolator, DC-DC Charger, or BMS: Which Charging Setup Do You Need?
Your charging hardware determines whether your system is safe with a modern vehicle or fighting it. Three main options exist, and the right one depends largely on how old your alternator is.
- Solenoid isolator. A relay connects the two batteries once the engine starts and disconnects them at shutdown. Simple and cheap, but it sends raw, unregulated alternator voltage to your aux battery, which works fine on older vehicles but can undercharge or damage LiFePO4 packs on newer ones.
- DC-DC charger. This unit takes alternator output and converts it into a proper, chemistry-specific charge profile. It’s safer for modern smart alternators than a simple isolator that vary voltage output to save fuel, and most models pass through solar input too.
- Full BMS or energy management system. Reserved for bigger builds running mixed chemistries, multiple charge sources, or heavy solar arrays where a simple charger can’t juggle every input safely.
Pro Tip: If your truck or SUV was built after roughly 2015, assume it has a smart alternator and skip the isolator entirely. A DC-DC charger with a LiFePO4-specific profile protects both your battery and your electrical system.
For most builds, a DC-DC charger sized to your alternator output and matched to your battery chemistry is the safest, least fussy choice. It costs more than a solenoid isolator, but pays for itself the first time it prevents a warranty claim.
How Do You Size Your Auxiliary Battery for Your Trip?
Sizing your aux battery starts with a load audit, not a battery spec sheet. List every device, its amp draw, and hours of daily use, then total the amp-hours you actually need.
- List each device with its rated amps and expected daily runtime in hours.
- Multiply amps by hours for each device to get daily amp-hours.
- Add every device’s total for your daily amp-hour requirement.
- Divide by your chemistry’s usable capacity percentage to find the battery size needed.
- Add a buffer of 15 to 20% for heat, age, and cloudy solar days.
Statistic Callout: *A 12V fridge drawing 3 amps for 8 hours a day uses roughly 24Ah daily.
Add lights, a water pump, and phone charging, and a weekend trip commonly lands between 60 and 80Ah of daily use.
| Pack Size | Typical Use Case |
|---|---|
| 50 to 60Ah | Weekend trips, fridge only |
| 100Ah | Multi-day trips, fridge plus lighting and electronics |
| 150 to 180Ah | Extended off-grid stays, inverter loads, multiple users |
A battery capacity planning guide can help you refine this math against your specific gear list before you buy.
Wiring and Installation: What Does the Checklist Look Like?
Good wiring is mostly about protecting cable runs and connections from failure, not just connecting point A to point B; professional electrical and battery service listings can help ensure your installation is safe and reliable. Every leg of the circuit needs the right gauge and the right fuse in the right spot.
- Run the main positive cable from the starter battery through the charger to the aux battery positive terminal.
- Fuse near the starter battery positive AND near the aux battery positive, not just one end.
- Return negatives separately to a common chassis ground rather than daisy-chaining grounds, which avoids voltage-differential issues that cause phantom drains and erratic readings.
- Mount LiFePO4 batteries with airflow in mind since they’re heat-sensitive; AGM tolerates tighter under-hood spaces better.
- Secure both batteries against vibration with a proper tray and hold-down, not just a bungee cord.
Cable gauge scales fast with distance. A run under a meter might get away with 4-gauge wire, but a 3-meter run pulling real current often needs 2-gauge or heavier, and anything past 4 to 5 meters can push you toward 0-gauge. Voltage drop, not just amp capacity, is what actually limits your wire choice.
Fuse placement matters as much as gauge. Put an ANL or inline fuse within about 30 centimeters of each battery’s positive terminal, since that’s the section of cable most likely to short against the chassis.
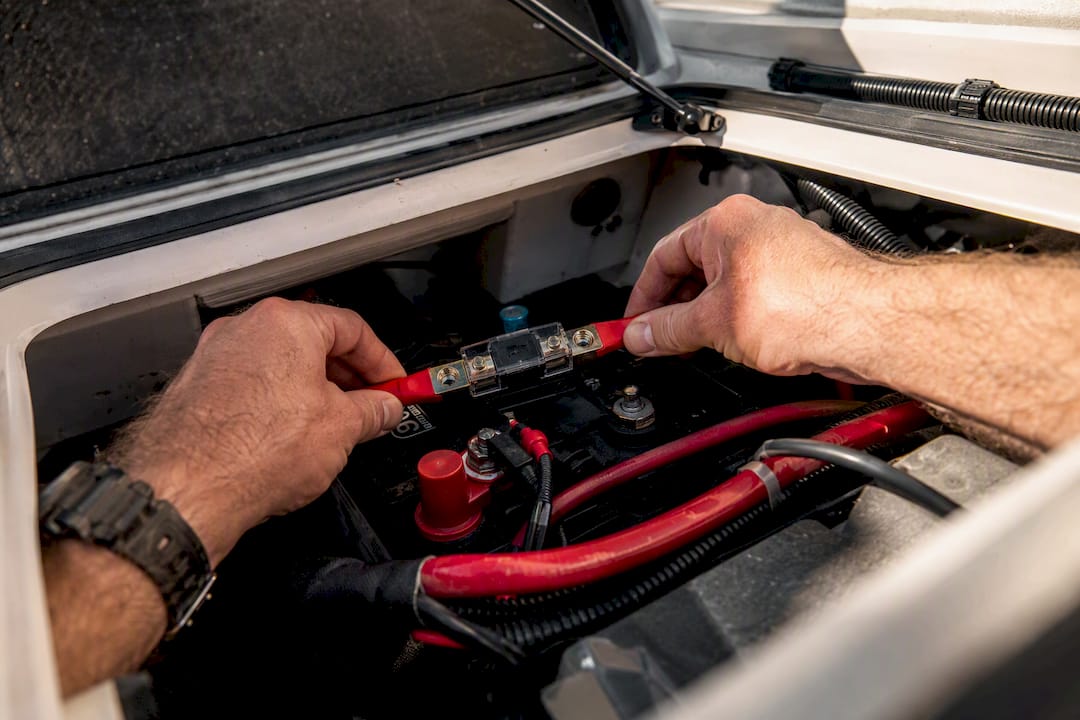
Pro Tip: After installation, check voltage at both batteries with the engine off (should read close to resting voltage for the chemistry) and again with the engine running (should show charging voltage from the DC-DC charger, typically 13.6 to 14.6V for LiFePO4). A mismatch between the two readings usually points to a wiring or charger fault, not a bad battery.
How Do You Test and Maintain a Dual Battery System?
Testing both batteries as one combined unit is the single most common mistake overlanders make, and it hides real problems. A weak aux battery can look fine when it’s riding along on a healthy starter battery’s voltage.
The correct flow disconnects the parallel connection first, then tests each battery separately against its own role-specific standard since starting batteries and deep-cycle batteries get evaluated differently. A CCA-focused test on a deep-cycle battery, or a capacity test on a starting battery, produces misleading results either way.
- Disconnect the isolator or charger link before testing.
- Test the starter battery for cold-cranking amps and voltage.
- Test the aux battery for capacity and voltage under load.
- Inspect terminals for corrosion every few months, more often near the coast.
- Check DC-DC charger firmware or settings annually if your model supports updates.
Statistic Callout: Diagnostic guidance warns that replacing only one battery in an aged parallel pair can accelerate failure of the new one due to resistance mismatch between old and new cells. When one battery fails and its partner is several years old, replace both together.
Watch for slow cranking, a charger that won’t reach full voltage, or an aux battery that drains faster than your load audit predicts. Those are your isolator or combiner telling you it’s time for a closer look.
Comparison of Popular Dual Battery System Brands and Their Features
Shopping for dual battery components usually means comparing across a few categories rather than one single “best” product: battery chemistry, charger compatibility, warranty length, and whether the manufacturer supports powersports and marine use cases in addition to automotive.
Entry-level AGM options from general automotive brands tend to focus on cost and availability, often carrying warranties in the 1 to 3 year range. That works for readers running a simple isolator setup on an older vehicle with modest loads.
Mid-tier and premium LiFePO4 packs differentiate themselves on usable capacity, built-in battery management, and warranty length. This is where Banshee Batteries positions its lineup, with LiFePO4 batteries designed for auxiliary and deep-cycle roles across powersports, marine, and RV applications, backed by a 5-year warranty on lithium and 4-year on AGM. That warranty length matters more than most buyers realize: a lithium pack running daily fridge cycles for years needs a manufacturer standing behind it that long, not just at the point of sale.
When comparing brands generally, look past sticker price and check these features: usable Ah rating (not just nominal Ah), built-in BMS protection, published cycle life, cold-weather performance data, and whether the company offers a fitment tool or direct support for matching a battery to your specific vehicle or trip profile. A chemistry comparison breakdown can help you weigh these trade-offs against your specific rig before committing to a purchase.
What Should You Budget for a Dual Battery Setup?
A realistic dual battery build breaks into four cost categories: the battery itself, the charging hardware, wiring and fusing components, and mounting hardware. Skipping a line item to save money usually costs more later in a failed install or a fried charger.
A 100Ah LiFePO4 battery typically represents the single largest expense in the build, followed by the DC-DC charger. Budget for cable, lugs, fuses, a battery tray, and a battery box or enclosure as a separate line, since these small parts add up faster than most first-time builders expect.
Here’s a practical way to sequence the purchase:
- Confirm your load audit total first. Buying the battery before you know your daily amp-hour need almost always leads to over or undersizing.
- Match the charger to the battery chemistry, not just the vehicle. A charger without a LiFePO4 profile will undercharge a lithium pack even if it’s wired correctly.
- Buy wiring and fusing components as a matched set rather than piecing them together from whatever’s in a drawer, since undersized cable is the most common cause of voltage drop complaints.
- Add mounting hardware last, once you know the battery’s physical dimensions and where it’s going.
- Set aside a contingency for connectors, heat-shrink, and small tools if you’re doing the install yourself.
If the total is tight, it’s better to buy a smaller, correctly wired system now and upgrade the battery later than to install oversized capacity on undersized wire. The wiring and fusing rarely need to change when you upgrade a battery within the same voltage class, but a battery that outgrows its charger or cable needs a full rework.
Why Isn’t My Dual Battery System Working Right?
Most dual battery problems trace back to one of three causes: a wiring or fusing mistake, a charger mismatch with the battery chemistry, or a connection that’s loosened or corroded over time. Diagnosing systematically saves hours of guesswork.
If the aux battery isn’t charging at all, check the DC-DC charger’s input voltage first. A charger that isn’t seeing enough voltage from the alternator, often due to an undersized or overly long cable run, will simply refuse to enter its charge cycle. This is also the most common symptom of using 4-gauge wire on a run that needed 2-gauge or heavier.
If the starter battery seems to drain along with the aux battery, suspect the isolator or DC-DC charger’s isolation function has failed, effectively turning your two-battery system into one big battery bank. That’s exactly the failure mode a dual system is supposed to prevent.
Blown fuses that keep blowing point to either a wiring short against the chassis or a fuse rated too low for the actual current draw, not a random defect. Check for chafed insulation anywhere the cable runs near a sharp edge or moving part before assuming the fuse itself is bad.
An aux battery that drains faster than your load audit predicts usually means either a phantom load you didn’t account for, like an inverter left in standby mode, or a charger not reaching full voltage during drive time. Re-run your load audit against actual usage before assuming the battery itself is failing.
How Do You Add Solar Panels and Inverters to Your Setup?
Solar and inverters both tie into the aux battery side of your system, but the order you wire them in changes how well they perform. Most DC-DC chargers on the market today include a dedicated solar input with a feature that prioritizes solar over alternator power when the sun’s out, which saves fuel and reduces alternator load.
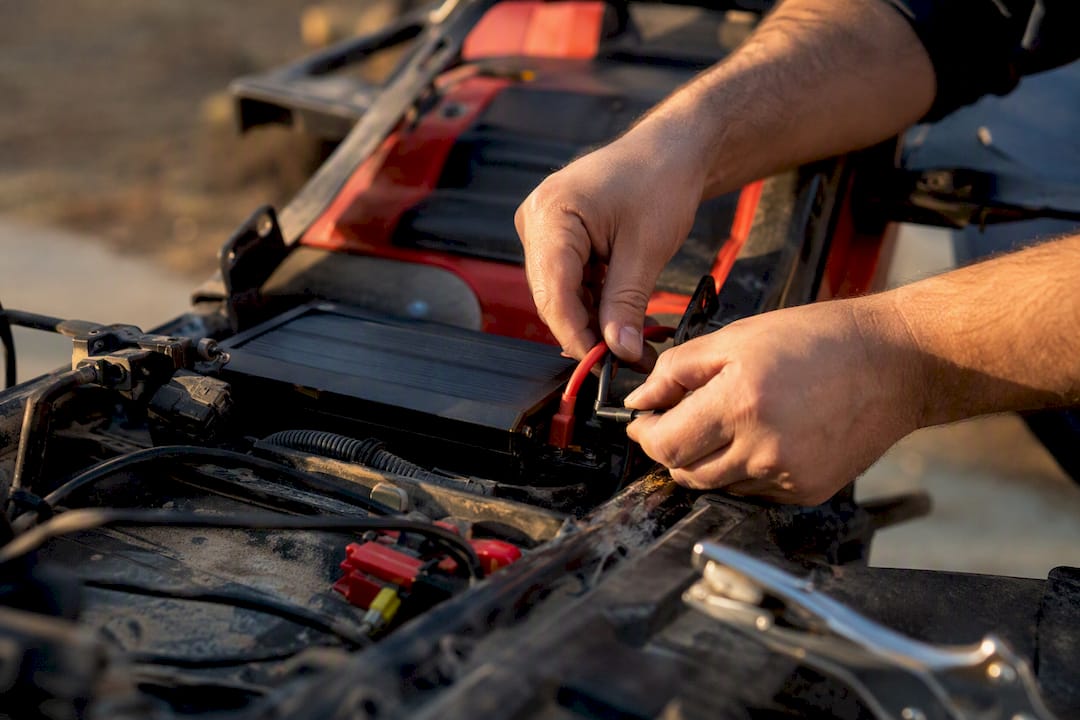
Wire solar panels through the charger’s dedicated solar input rather than straight to the battery terminals whenever your charger supports it. That routing keeps the charge profile consistent regardless of which power source is active, which matters more for LiFePO4 than AGM since lithium is pickier about charge voltage.
Inverters draw directly from the aux battery bank, so size their wiring for the inverter’s peak draw, not its average draw. A 2,000 watt inverter can pull well over 150 amps at 12V under full load, and undersized cable here creates a genuine fire risk, not just a performance issue.
Keep inverter and solar wiring on separate fused circuits from your main charging path. That way a fault in one accessory doesn’t take down your entire charging system, and troubleshooting stays simple: one problem, one circuit, one fuse to check.
What I’ve Learned Watching Overlanders Build These Systems
The single most common mistake isn’t the wiring diagram, it’s people undersizing cable to save a few dollars on a run that turns out to be longer than expected once it’s routed around the chassis. That mistake is invisible until the truck’s parked at a fridge-killing 90 degrees Fahrenheit, three days into a trip.
The real trade-off nobody talks about enough is that lighter, more expensive LiFePO4 systems often save you money over a five-year window compared to cheaper AGM setups you replace twice in that span. Weight savings matter too, especially on rigs already fighting suspension limits with rooftop tents and drawer systems.
Banshee’s warranty terms matter here for a practical reason: a 5-year commitment on lithium tells you the manufacturer expects the battery to survive daily fridge cycling for that long, which is exactly the stress test overland use puts on a battery. Contact support before buying if your rig has an unusual charging setup, that’s what warranty backing is for.
— Donald
Get the Right Battery for Your Overland Build
Banshee Batteries builds LiFePO4 packs specifically for the auxiliary role this guide recommends, not repurposed starting batteries pressed into deep-cycle duty. The 12V 100Ah LiFePO4 battery matches the sizing math covered above almost exactly, and it’s backed by a 5-year warranty on lithium marine batteries and a 4-year warranty on AGM, longer than most budget alternatives on the market.
If you’re still weighing chemistry options for your specific rig, browse the full lithium LiFePO4 marine battery collection to compare capacities side by side. Riders and powersports builders can check the lithium powersport battery lineup for compact options that fit tighter mounting spaces. Not sure which battery fits your vehicle or trailer setup? Reach out to Banshee’s support team for fitment guidance before you order; getting the size and terminal configuration right the first time saves a return shipment and a delayed trip.
Sources
For deeper technical detail beyond this guide, Midtronics publishes testing guidance for dual-battery vehicle setups that explains why combined-system testing produces false readings. Trail Owl’s wiring and fusing walkthrough covers cable gauge math in more depth. Adventure20’s build guide shows a real-world wiring diagram from an actual overland rig.
- Testing dual-battery vehicle setups | Midtronics
- Overlanding Electrical System — How to Wire a Dual Battery Setup - Trail Owl
- How to Build a Dual Battery System for Overland Vehicles